# Nginx 常用模块
# 1. Nginx 安装部署
# 1.1 安装 Nginx 方式
安装 Nginx 软件的方式有很多种,分为如下几种
- 源码编译 =>Nginx (1. 版本随意 2. 安装复杂 3. 升级繁琐)
- epel 仓库 =>Nginx (1. 版本较低 2. 安装简单 3. 配置不易读)
- 官方仓库 =>Nginx (1. 版本较新 2. 安装简单 3. 配置易读,强烈推荐
# 1.2 安装 Nginx 依赖
# 1.3 配置 Nginx 源
官网 https://nginx.org -> 点击 download -> 点击 Pre-Built Packages-> 点击 stable and mainline -> 选择系统 RHEL and derivatives
| [root@web01 ~] |
| [nginx-stable] |
| name=nginx stable repo |
| baseurl=http://nginx.org/packages/centos/$releasever/$basearch/ |
| gpgcheck=1 |
| enabled=1 |
| gpgkey=https://nginx.org/keys/nginx_signing.key |
| module_hotfixes=true |
# 1.4 安装 Nginx 服务
| [root@web01 ~] |
| [root@web01 ~] |
# 1.5 检查 Nginx 版本
| |
| [root@web01 ~] |
| nginx version: nginx/1.26.1 |
| |
| |
| [root@web01 ~] |
# 2. Nginx 目录结构
| |
| /etc/nginx/conf.d/default.conf |
| /etc/nginx/nginx.conf |
| |
| |
| /etc/nginx/fastcgi_params |
| /etc/nginx/scgi_params |
| /etc/nginx/uwsgi_params |
| |
| |
| /etc/nginx/mime.types |
| |
| |
| /usr/sbin/nginx |
| /usr/sbin/nginx-debug |
| |
| |
| /var/log/nginx |
| /etc/logrotate.d/nginx |
# 3. Nginx 基本配置
| [root@web01 ~] |
| user nginx; |
| worker_processes auto; |
| error_log /var/log/nginx/error.log notice; |
| pid /var/run/nginx.pid; |
| events { |
| worker_connections 1024; |
| } |
| http { |
| include /etc/nginx/mime.types; |
| default_type application/octet-stream; |
| log_format main '$remote_addr - $remote_user [$time_local] "$request" ' |
| '$status $body_bytes_sent "$http_referer" ' |
| '"$http_user_agent" "$http_x_forwarded_for"'; |
| access_log /var/log/nginx/access.log main; |
| sendfile on; |
| |
| keepalive_timeout 65; |
| |
| include /etc/nginx/conf.d/*.conf; |
| } |
# 4. Nginx 虚拟主机
Nginx 配置虚拟主机有如下三种方式
- 1、基于主机多 IP 方式
- 2、基于端口的配置方式
- 3、基于多个 hosts 名称方式 (多域名方式
# 4.1 基于多 IP 虚拟主机实践
| [root@web01 ~] |
| server { |
| ... |
| listen 10.0.0.7:80; |
| ... |
| } |
| |
| server { |
| ... |
| listen 172.16.1.7:80; |
| ... |
| } |
# 4.2 基于多端口虚拟主机实践
| [root@web01 ~] |
| server { |
| ... |
| listen 80; |
| ... |
| } |
| |
| [root@web01 ~] |
| server { |
| ... |
| listen 81; |
| ... |
| } |
# 4.3 基于多域名虚拟主机实践
| [root@web01 ~] |
| [root@web01 ~] |
| |
| [root@web01 ~] |
| server { |
| listen 80; |
| server_name server1.oldxu.net; |
| |
| root /code/server1; |
| index index.html; |
| ... |
| } |
| |
| [root@web01 ~] |
| server { |
| ... |
| listen 80; |
| server_name server2.oldxu.net; |
| root /code/server2; |
| index index.html; |
| } |
# 5. Nginx 常用模块
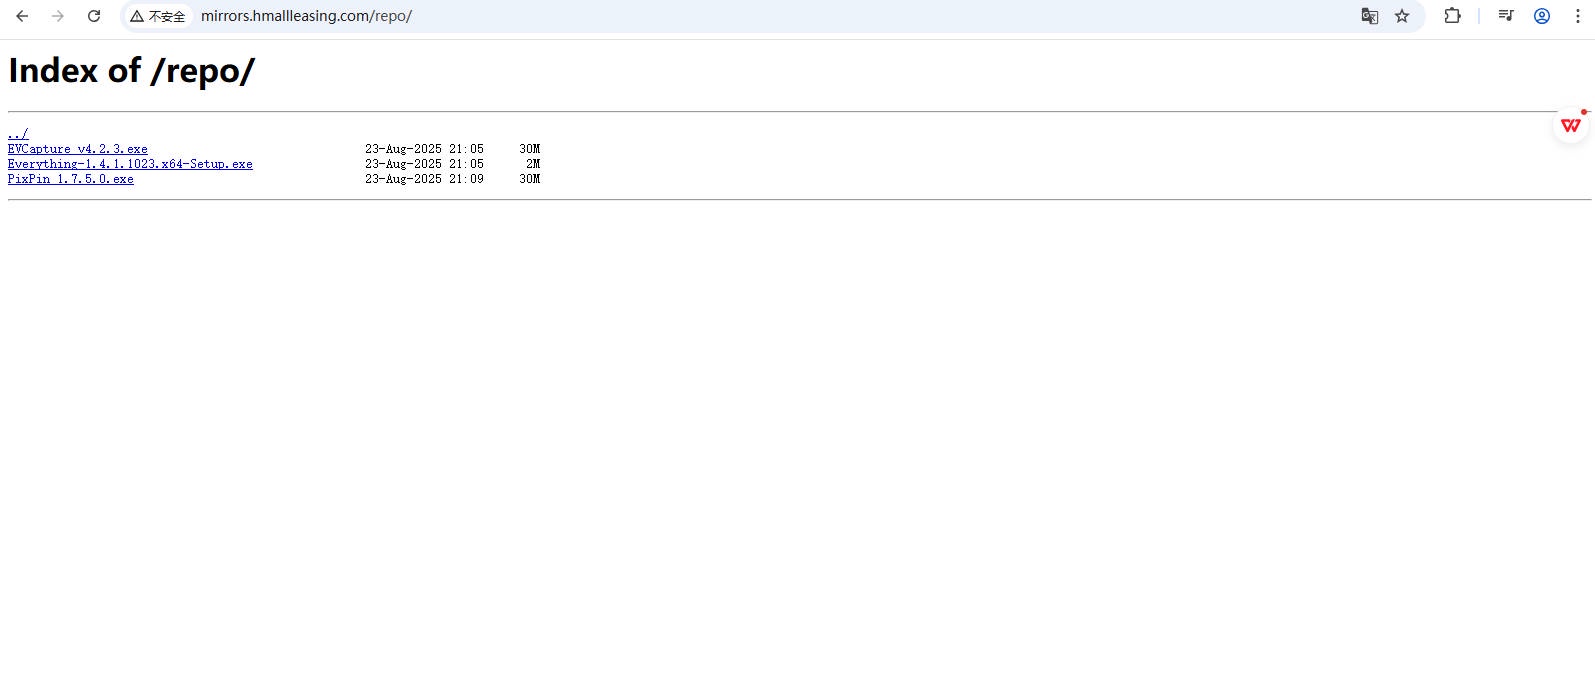
# 5.1 Nginx 目录索引
当 ngx_http_index_module 模块找不到索引文件时,通常会将请求传递给 ngx_http_autoindex_module 模块。
ngx_http_autoindex_module 模块处理以斜杠字符 ('/') 结尾的请求,并生成目录列表。
# 5.1.1 配置语法
| |
| Syntax: autoindex on | off; |
| Default: autoindex off; |
| Context: http, server, location |
| |
| |
| 节,off显示大概单位。 |
| Syntax: autoindex_exact_size on | off; |
| Default: autoindex_exact_size on; |
| Context: http, server, location |
| |
| |
| 本地时区,off UTC时间。 |
| Syntax: autoindex_localtime on | off; |
| Default: autoindex_localtime off; |
| Context: http, server, location |
# 5.1.2 配置示例
| [root@web01 conf.d] |
| server { |
| listen 80; |
| server_name mirrors.hmallleasing.com; |
| charset utf-8; |
| root /mirrors; |
| |
| location / { |
| index index.html; |
| } |
| |
| location /repo { |
| autoindex on; |
| autoindex_exact_size off; |
| autoindex_localtime on; |
| } |
| } |
| |
| [root@web01 conf.d] |
| [root@web01 conf.d] |
| [root@web01 repo] |
| -rw-r--r-- 1 root root 31367480 Aug 23 21:05 EVCapture_v4.2.3.exe |
| -rw-r--r-- 1 root root 1885872 Aug 23 21:05 Everything-1.4.1.1023.x64-Setup.exe |
| -rw-r--r-- 1 root root 31456728 Aug 23 21:09 PixPin_1.7.5.0.exe |
| |
| [root@web01 ~] |
| [root@web01 ~] |
![1.jpg]()
# 5.2 Nginx 访问控制
ngx_http_access_module 模块允许限制对某些客户端地址的访问。
# 5.2.1 配置语法
| |
| Syntax: allow address | CIDR | unix: | all; |
| Default: — |
| Context: http, server, location,limit_except |
| |
| |
| Syntax: deny address | CIDR | unix: | all; |
| Default: — |
| Context: http, server, location,limit_except |
# 5.2.2 配置示例
| [root@web01 conf.d] |
| server { |
| listen 80; |
| server_name mirrors.hmallleasing.com; |
| charset utf-8; |
| root /mirrors; |
| |
| location / { |
| index index.html; |
| } |
| |
| location /repo { |
| autoindex on; |
| autoindex_exact_size off; |
| autoindex_localtime on; |
| |
| allow 192.168.40.1/32; |
| deny all; |
| } |
| } |
| |
| [root@web01 conf.d] |
| [root@web01 conf.d] |
| [root@web01 conf.d] |
| <html> |
| <head><title>403 Forbidden</title></head> |
| <body> |
| <center><h1>403 Forbidden</h1></center> |
| <hr><center>nginx/1.26.1</center> |
| </body> |
| </html> |
注意 **:deny 和 allow** 的顺序是有影响的
- 默认情况下,从第一条规则进行匹配
- 如果匹配成功,则不继续匹配下面的内容。
- 如果匹配不成功,则继续往下寻找能匹配成功的内容。
# 5.3 Nginx 基础认证
ngx_http_auth_basic_module 模块允许使用 HTTP 基本身份验证,验证用户名和密码来限制对资源的访问。
# 5.3.1 配置语法
| |
| Syntax: auth_basic string| off; |
| Default: auth_basic off; |
| Context: http, server, location,limit_except |
| |
| |
| Syntax: auth_basic_user_file file; |
| Default: - |
| Context: http, server, location,limit_except |
指定保存用户名和密码的文件,格式如下:
| |
| name1:passwd1 |
| name2:passwd2 |
| |
| |
| [root@oldxu ~] |
| [root@oldxu ~] |
# 5.3.2 配置示例
| [root@web01 conf.d] |
| server { |
| listen 80; |
| server_name mirrors.hmallleasing.com; |
| charset utf-8; |
| root /mirrors; |
| |
| location / { |
| index index.html; |
| } |
| |
| location /repo { |
| autoindex on; |
| autoindex_exact_size off; |
| autoindex_localtime on; |
| |
| allow 192.168.40.1/32; |
| deny all; |
| |
| auth_basic "welcome to auth_basic"; |
| auth_basic_user_file auth_conf; |
| } |
| } |
| |
| [root@web01 conf.d] |
| [root@web01 conf.d] |
# 5.4 Nginx 限流限速
# 5.4.1 为什么要限速
限制某个用户在一定时间内能够产生的 Http 请求。或者说限制某个用户的下载速度。
# 5.4.2 限速应用场景
下载限速:限制用户下载资源的速度;
ngx_http_core_module
请求限制:限制用户单位时间内所产生的 Http 请求数;
ngx_http_limit_req_module
连接限制:限制同一时间的连接数,及并发数限制;
ngx_http_limit_conn_module
# 5.4.3 限制请求并发数
1. 语法
| Syntax: limit_req_zone key zone=name:size rate=rate; |
| Default: — |
| Context: http |
| |
| Syntax: limit_req zone number [burst=number] [nodelay]; |
| Default: — |
| Context: http, server, location |
2. 基于来源 IP 对下载速率限制,限制每秒处理 1 次请求,但可以突发超过 5 个请求放入缓存区
| |
| http { |
| limit_req_zone $binary_remote_addr zone=req_one:10m rate=1r/s; |
| } |
| server { |
| listen 80; |
| server_name mirror.oldxu.net; |
| |
| limit_req zone=req_one burst=3 nodelay; |
| |
| location / { |
| root /code; |
| index index.html; |
| } |
| } |
| |
| limit_req_zone $binary_remote_addr zone=req_one:10m rate=1r/s; |
| |
| |
| |
| |
| limit_req zone=req_one burst=3 nodelay; |
| |
| |
| |
3. 配置示例
| [root@web01 ~] |
| |
| limit_req_zone $binary_remote_addr zone=req_one:10m rate=1r/s; |
| |
| server { |
| listen 80; |
| server_name mirrors.hmallleasing.com; |
| charset utf-8; |
| root /mirrors; |
| |
| limit_req zone=req_one burst=5 nodelay; |
| limit_req_status 500; |
| |
| location / { |
| index index.html; |
| } |
| |
| location /repo { |
| autoindex on; |
| autoindex_exact_size off; |
| autoindex_localtime on; |
| |
| allow 192.168.40.1/32; |
| deny all; |
| |
| auth_basic "welcome to auth_basic"; |
| auth_basic_user_file auth_conf; |
| } |
| } |
| |
| [root@web01 ~] |
| [root@web01 ~] |
# 5.4.5 限制并发连接数
1. 指令
| Syntax: limit_conn_zone key zone=name:size; |
| Default: — |
| Context: http |
| |
| Syntax: limit_conn zone number; |
| Default: — |
| Context: http, server, location |
2. 设置共享内存区域和给定键值的最大允许个连接数。超过此限制时,服务器将返回 503 错误以回复请求
| [root@web01 ~] |
| |
| limit_conn_zone $binary_remote_addr zone=conn_od:10m; |
| |
| server { |
| listen 80; |
| server_name mirrors.hmallleasing.com; |
| charset utf-8; |
| root /mirrors; |
| |
| |
| limit_conn conn_od 20; |
| |
| |
| error_page 503 @errpage; |
| location @errpage { |
| default_type text/html; |
| return 302 https://vip.qq.com; |
| } |
| |
| location / { |
| index index.html; |
| } |
| |
| location /repo { |
| autoindex on; |
| autoindex_exact_size off; |
| autoindex_localtime on; |
| |
| allow 192.168.40.1/32; |
| deny all; |
| |
| auth_basic "welcome to auth_basic"; |
| auth_basic_user_file auth_conf; |
| } |
| } |
| |
| [root@web01 ~] |
| [root@web01 ~] |
| [root@web01 mirrors] |
# 5.4.6 限制下载速度
| [root@web01 mirrors] |
| server { |
| listen 80; |
| server_name mirrors.hmallleasing.com; |
| charset utf-8; |
| root /mirrors; |
| |
| limit_rate_after 100m; |
| |
| limit_rate 100k; |
| |
| |
| error_page 503 @errpage; |
| location @errpage { |
| default_type text/html; |
| return 302 https://vip.qq.com; |
| } |
| |
| location / { |
| index index.html; |
| } |
| |
| location /repo { |
| autoindex on; |
| autoindex_exact_size off; |
| autoindex_localtime on; |
| |
| allow 192.168.40.1/32; |
| deny all; |
| |
| auth_basic "welcome to auth_basic"; |
| auth_basic_user_file auth_conf; |
| } |
| } |
# 5.4.7 综合场景实践
- 1、限制 web 服务器请求数处理为 1 秒一个,触发值为 5、限制用户仅可同时下载一个文件;
- 2、当下载超过 100M 则限制下载速度为 500k;
- 3、如果同时下载超过 2 个视频,则返回提示 "请联系 oldxu 进行会员充值" | 跳转到其他页面;
| [root@web01 mirrors] |
| limit_req_zone $binary_remote_addr zone=req_one:10m rate=1r/s; |
| limit_conn_zone $binary_remote_addr zone=conn_od:10m; |
| |
| server { |
| listen 80; |
| server_name mirrors.hmallleasing.com; |
| root /mirrors; |
| |
| |
| limit_req zone=req_one burst=5 nodelay; |
| |
| |
| limit_conn conn_od 1; |
| |
| |
| limit_rate_after 100m; |
| |
| limit_rate 500k; |
| |
| |
| error_page 503 @errpage; |
| location @errpage { |
| default_type text/html; |
| return 302 https://vip.qq.com; |
| } |
| |
| location / { |
| index index.html; |
| } |
| } |
| |
| [root@web01 mirrors] |
| [root@web01 mirrors] |
| [root@web01 mirrors] |
# 5.5 Nginx 状态监控
ngx_http_stub_status_module 模块提供对基本状态信息的访问。
默认情况下不集成该模块,需要使用 --with-http_stub_status_module 集成。
# 5.5.1 配置语法
| Syntax: stub_status; |
| Default: — |
| Context: server, location |
# 5.5.2 配置示例
| [root@web01 mirrors] |
| server { |
| listen 80; |
| server_name mirrors.hmallleasing.com; |
| |
| location / { |
| index index.html; |
| } |
| |
| location /nginx_status { |
| stub_status; |
| |
| allow 192.168.40.1/32; |
| deny all; |
| } |
| } |
| |
| [root@web01 mirrors] |
| [root@web01 mirrors] |
# 5.5.3 页面状态
此配置创建一个简单的网页,其基本状态数据可能如下所示
| [root@web01 mirrors] |
| Active connections: 1 |
| server accepts handled requests |
| 20 20 42 |
| Reading: 0 Writing: 1 Waiting: 0 |
| |
| |
| |
| |
| |
| |
| |
| |
| |
| [root@web01 mirrors] |
# 5.6 Nginx 资源压缩
Nginx 将发送至客户端之前的数据进行压缩,然后传输,这能够有效地节约带宽,并提高响应速度;
# 5.6.1 配置语法
| |
| Syntax: gzip on | off; |
| Default: gzip off; |
| Context: http, server, location, if in location |
| |
| |
| Syntax: gzip_types mime-type ...; |
| Default: gzip_types text/html; |
| Context: http, server, location |
| |
| |
| Syntax: gzip_comp_level level; |
| Default: gzip_comp_level 1; |
| Context: http, server, location |
| |
| |
| 缩(由"Content-Length"响应头字段确定) |
| Syntax: gzip_min_length length; |
| Default: gzip_min_length 20; |
| Context: http, server, location |
| |
| |
| Syntax: gzip_http_version 1.0 | 1.1; |
| Default: gzip_http_version 1.1; |
| Context: http, server, location |
| |
| |
| Accept-Encoding" |
| Syntax: gzip_vary on | off; |
| Default: gzip_vary off; |
| Context: http, server, location |
# 5.6.2 图片压缩案例
| [root@web01 ~] |
| [root@web01 conf.d] |
| server { |
| listen 80; |
| server_name static.hmallleasing.com; |
| root /code/images; |
| |
| location ~* .*\.(jpg|gif|png)$ { |
| gzip on; |
| gzip_http_version 1.1; |
| gzip_comp_level 2; |
| gzip_min_length 10k; |
| gzip_types image/jpeg image/gif image/png; |
| gzip_vary on; |
| } |
| } |
| |
| [root@web01 conf.d] |
| [root@web01 conf.d] |
# 5.6.3 文件压缩案例
| [root@web01 ~] |
| [root@web01 conf.d] |
| server { |
| listen 80; |
| server_name static.hmallleasing.com; |
| root /code/doc; |
| |
| location ~ .*\.(txt|pdf)$ { |
| gzip on; |
| gzip_http_version 1.1; |
| gzip_comp_level 2; |
| gzip_min_length 10k; |
| gzip_types text/plain application/pdf;; |
| gzip_vary on; |
| } |
| } |
| |
| [root@web01 conf.d] |
| [root@web01 conf.d] |
# 5.7 Nginx Location
Location 用来控制访问网站的 uri 路径。
# 5.7.1 Location 语法示例
| location [ = | ~ | ~* | ^~ ] uri { ... } |
| location @name { ... } |
| /api/xxx/dadas/dsadsa |
| /apiv1/dsa/dsaxx/sadsa/ |
| |
| |
| |
| |
| |
| |
| |
# 5.7.2 Location 优先级示例
| [root@web01 conf.d] |
| server { |
| listen 80; |
| server_name location.oldxu.net; |
| |
| location = / { |
| default_type text/html; |
| return 200 'location = /'; |
| } |
| |
| location / { |
| default_type text/html; |
| return 200 'location /'; |
| } |
| |
| location /documents/ { |
| default_type text/html; |
| return 200 'location /documents/'; |
| } |
| |
| location ^~ /images/ { |
| default_type text/html; |
| return 200 'location ^~ /images/'; |
| } |
| |
| location ~* \.(gif|jpg|jpeg)$ { |
| default_type text/html; |
| return 200 'location ~* \.(gif|jpg|jpeg)'; |
| } |
| } |
| |
| |
| |
| |
| |
| |
| |
# 5.7.3 Location 应用场景
| [root@web01 conf.d] |
| server { |
| listen 80; |
| server_name location2.hmallleasing.com; |
| charset utf-8; |
| |
| |
| location / { |
| root html; |
| index index.html; |
| } |
| |
| |
| location = /nginx_status { |
| stub_status; |
| } |
| |
| |
| location ~ \.php$ { |
| default_type text/html; |
| return 200 'php访问成功'; |
| } |
| |
| |
| location ~ \.jsp$ { |
| default_type text/html; |
| return 200 'jsp访问成功'; |
| } |
| |
| |
| location ~* \.(jpg|gif|png|js|css)$ { |
| |
| expires 3d; |
| } |
| |
| |
| location ~* \.(sql|bak|tgz|tar.gz|.git)$ { |
| deny all; |
| default_type text/html; |
| return 200 '禁止访问!!!'; |
| } |
| } |
# 5.7.4 Location @重定向
| [root@web01 conf.d] |
| server { |
| listen 80; |
| server_name location3.hmallleasing.com; |
| root /code; |
| |
| location / { |
| index index.html; |
| } |
| |
| |
| |
| |
| error_page 404 @error_404; |
| location @error_404 { |
| default_type text/html; |
| |
| return 302 http://$server_name; |
| } |
| } |
# 5.8 Nginx 日志模块
Nginx 的日志记录非常灵活,可以通过 log_format 来定义格式。
# 5.8.1 Nginx 日志格式
1.log_format 定义日志格式语法
| |
| Syntax: log_format name [escape=default|json] string ...; |
| Default: log_format combined "..."; |
| Context: http |
2. 默认 Nginx 定义语法格式如下
| log_format main '$remote_addr - $remote_user [$time_local] "$request" ' |
| '$status $body_bytes_sent "$http_referer" ' |
| '"$http_user_agent" "$http_x_forwarded_for"'; |
| |
| log_format test '$remote_addr - $remote_user [$time_local] "$request" '$status'; |
| log_format test '$remote_addr - $remote_user [$time_local] "$request" ' |
| '$status '; |
| |
| |
| /var/log/nginx/access.log main; |
| |
| /var/log/nginx/access_test.log test; |
3.Nginx 日志格式中常用的变量
| $remote_addr |
| $remote_user |
| $time_local |
| $time_iso8601 |
| $request |
| $status |
| $body_bytes_sent |
| $bytes_sent |
| $msec |
| $http_referer |
| $http_user_agent |
| $http_x_forwarded_for |
| $request_length |
| $request_time |
| |
| |
| |
| |
# 5.8.2 Nginx 访问日志
1.web 服务器的访问日志是非常重要的,我们可以通过访问日志来分析用户的访问情况,也可以通过访问日志发现一些异常访问。access_log 日志配置语法。
| Syntax: access_log path [format [buffer=size] [gzip[=level]] [flush=time] [if=condition]]; |
| access_log off; |
| Default: access_log logs/access.log combined; |
| Context: http, server, location, if in location, limit_except |
| |
| http { |
| access_log /var/log/nginx/access.log main; |
| |
| server { |
| |
| } |
| |
| server { |
| access_log /var/log/nginx/test.hmallleasing.com.log main; |
| |
| location / { |
| access_log /var/log/nginx/test.hmallleasing.com.log main; |
| } |
| |
| location /admin { |
| |
| } |
| } |
| } |
2.Nginx 访问日志配置示例
| server { |
| listen 80; |
| server_name log.hmallleasing.com; |
| |
| access_log /var/log/nginx/log.hmallleasing.com.log main; |
| |
| location / { |
| root /code; |
| index index.html; |
| } |
| } |
# 5.8.3 Nginx 错误日志
Nginx 常见的错误日志级别有 debug | info | notice| warn | error | crit | alert | emerg 级别越高记录的信息越少,如果不定义,默认级别为 warn,它可以配置在 main、http、server、location 段里
Nginx 错误日志示例:
| error_log /var/log/nginx/error.log warn; |
| |
| |
| error_log /dev/null; |
# 5.8.4 Nginx 日志过滤
一个网站会包含很多元素,尤其是有大量的 images、js、css 等静态资源。这样的请求可以不用记录日志。
| |
| location /favicon.ico { |
| access_log off; |
| return 200; |
| } |
| |
| location ~* .*\.(gif|jpg|png|css|js)$ { |
| access_log /dev/null; |
| } |